Category: Networking

  • Used Hard Drives are incredibly cheap – use them safely with ZFS

    Used Hard Drives are incredibly cheap – use them safely with ZFS

    In late 2023 we live in an era of super cheap storage. Be it flash based or spinning rust, they can be regularly had for 30€ and 13€ per TB respectively. Just a few years ago you had pick very specific high density (for the time) disks to get under 20€ per TB. This isn’t necessarily practical if you only need moderate amounts of storage but want good redundancy. The true budget option is used magnetic storage, going for well under 3€ per TB. But how can you safely make use of worn, old disks? That’s where ZFS comes into play.

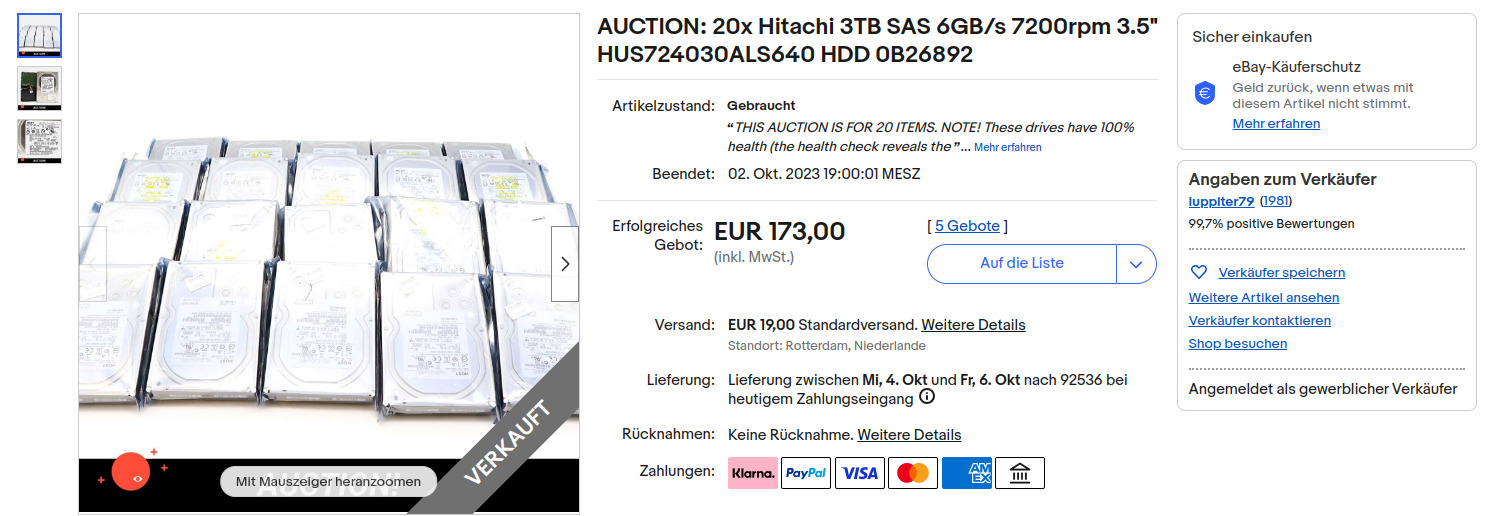
    Used HDD pricing in 2023

    The idea of using smaller used disks with high redundancy comes from the dramatic savings that can be achieved. I have seen several lots of 10-40 disks priced as low as 2.50€/TB. Now, using this many disks at once is somewhat impractical, even with high redundancy and (hot-)spares. But ironically, selling a part of such a lot as individual disks will increase their value, since most people don’t want the hassle of buying this many disks. Although individual disks (of this specific type) can go for similarly low prices, they can also go for up to 15€. Either way you would want to keep some spares.

    Reliability and redundancy with ZFS

    Now the reason why people are reluctant to buy used HDDs is due their limited lifetimes. Being mechanical in nature they will die eventually. Especially these super cheap lots of enterprise disks will have had a hard life with extremely high runtime in data centers. However:

    • These lots usually advertise their disks as 100% health.
    • They are enterprise grade and designed for very high uptime and high reliability
    • HDDs have come a long way. Even these older models are likely to be much more reliable than the ones that caused HDDs’ reputation for high failure rates.

    With that being said you will want to plan for failing disks, data corruption and bit rot. You should do that for any kind of storage, but for used Hard Drives especially. And the best system that gives you both redundancy and corruption resilience at home is ZFS. ZFS is a file system with native support for RAID, or replication of data across multiple disks through parity data. Unlike traditional RAID systems, however it also provides resiliency against bit rot.

    Bit rot is the degradation and corruption of data that can occur on many media. It can have many causes, but basically this phenomenon means that any storage media over time will lose and corrupt data and the only protection against that is parity and a system that can repair data from that parity. Traditional RAID will protect against failing hard disks, but it has no way of knowing which bits may have rotted or not. ZFS does that.

    How does it work?

    There are already many good ZFS tutorials out there, but to keep it theoretical, for very good resilience with used disks you may want to use RAIDZ3, meaning having the capacity of 3 disks as redundancy. If you had two four-port SAS-controllers (which can be had for well under 5€ each) you might have eight disks connected and keep two as cold spares. You could sell off the rest of the lot or keep it for future expansion. The ZFS calculator suggests you would then have 12TB of usable capacity, with cold spares and very high reliability for under 40€ all in. Sounds like a good deal to me.

    ZFS is an enterprise-grade file system can help you build a super reliable home storage solution on a tiny budget.
  • Oracle Cloud free ARM VMs are easily the best deal for hobbyists

    Oracle Cloud free ARM VMs are easily the best deal for hobbyists

    Cloud computing is becoming more and more accessible for anyone. If you are interested in running even non-trivial workloads for free, Oracle Cloud is now offering a very generous package consisting of 4 of their ARM based Ampere A1 cores and 24GB(!) of memory. These can be split into up to 4 VMs or used in a single machine. Additionally, you can still get 2 AMD x86 systems with shared cores on top, 200GB of disk storage and more.

    I was curious to see what kind of performance one could expect out of these ARM systems, so I ran a quick CPU sysbench on such a four core VM:

    CPU speed:
    events per second: 3354.74
    General statistics:
    total time: 10.0002s
    total number of events: 33561
    Latency (ms):
    min: 0.30
    avg: 0.30
    max: 0.39
    95th percentile: 0.30
    sum: 9992.77
    Threads fairness:
    events (avg/stddev): 33561.0000/0.00
    execution time (avg/stddev): 9.9928/0.00

    The main advantage of Oracle Cloud’s free cloud VM hosting offer is its superior CPU performance compared to for instance GCP. I still find their UI inferior in some aspects, but it’s managable. At least the services have sensible names (ahem… AWS). I’m certainly not missing any basic features that I would feel are relevant for more casual users. The main limitation on the other hand will probably be the fact that these cores are ARM – meaning software compatibility won’t be as much of a given as on AMD64. Most standard workloads should run fine, but you won’t have to look hard for incompatible ones either.

    Download: 1426.89 Mbit/s
    Upload: 1008.72 Mbit/s

    Network speed is reliably above 1 Gbit/s.

    Oracle Cloud VM: Conclusion

    Along with their generous free DB services which I have yet to try, Oracle is becoming an even more tempting option for users who don’t plan on paying anything – especially if you are not yet indoctrinated into the way of thinking of other cloud providers.

  • ‘Always Free’ cloud VM hosting – GCP vs Oracle for hobbyists

    Until recently Google Cloud Platform was the only major cloud provider that offered true ‘Always Free’, true VM hosting. Amazon Web Services does also offer Free “EC2” VM hosting, however that is only valid for one year. Recently however, Oracle has released their own Always Free Cloud VM offering that at first glance appears to be much more generous than Google’s. In this article I would like to compare the two to see which one is more worth it for hobbyists and small scale projects.

    2023 update: You may also be interested in this more recent look at Oracle Cloud VMs: Oracle Cloud free ARM VMs are easily the best deal for hobbyists

    On the paper

    On the paper Oracle claims you get “2 virtual machines with 1/8 OCPU and 1 GB memory each” for free forever. Looking up the term OCPU:

    An OCPU is defined as the CPU capacity equivalent of one physical core of an Intel Xeon processor with hyper threading enabled. For Intel Xeon processor each OCPU corresponds to two hardware execution threads, known as vCPUs.

    So that doesn’t really say anything about the actual performance and we’ll have to benchmark it.

    In terms of storage, it seems like we can expect a total of 100GB spread among the two VMs: “2 Block Volumes, 100 GB total.”. Another important factor is the amount of traffic you are allowed to cause: “Outbound Data Transfer, 10 TB per month.”. And while the number of Oracle’s data centers is quite limited, you are allowed to choose between any of them at no charge.

    On Google’s end, their “Always Free” offering contains one “F1-micro instance per month” which they define as a “Micro machine type with 0.2 vCPU and 0.60 GB of memory, backed by a shared physical core.”. Therefore I would expect to only get a single thread here and only 600MB of memory, but these instances also come with a “bursting” capability which allows for it to use more CPU when needed automatically: “Bursting happens automatically when your instance requires more physical CPU than originally allocated.” – whatever that means, but it should give it some advantage for short term applications, like the benchmark I’m about to perform.

    So far so good, but the disappointment starts when looking at the traffic: “1 GB network egress from North America to all region destinations per month (excluding China and Australia)”. Ingress is free, but with only 1GB you really can’t do a lot. Also this statement already implies another limitation: While Google has tons of data centers around the globe, you can only choose between three american ones for this free offering. Finally, disk space will be limited to 30GB.

    VM Benchmarks

    Both are running Ubuntu Server 18.04. Keep in mind that Oracle is offering two free VMs as opposed to just one from Google. I’ll just let the numbers speak for themselves:

    GCPOracle
    CPU typeIntel(R) Xeon(R) CPU @ 2.30GHzAMD EPYC 7551 32-Core Processor @ 2GHz
    Number of threads12
    CPU sysbench single thread (10000 primes)events per second: 947.98events per second:   574.18
    CPU sysbench two threads (10000 primes)events per second: 948.29events per second:   592.09
    CPU sysbench single thread (50000 primes)events per second: 104.79events per second:    61.01
    dd write speed: 1000 blocks, 1MB each40.0 MB/s61.3 MB/s
    dd read speed: same file85.9 MB/s55.1 MB/s
    dd read speed: same file after clearing the buffer79.7 MB/s57.5 MB/s
    sysbench memory transfer test (300MB)3478.31 MiB/sec1833.09 MiB/sec
    Internet connection speed with speedtest.pyDownload: 101.25 Mbit/s
    Upload: 199.86 Mbit/s
    Download: 47.65 Mbit/s
    Upload: 49.44 Mbit/s

    Other considerations

    Of course, there are other factors to consider. Google offers a wider selection of free additional services, but disregarding these, the user interfaces and documentations of the two providers are roughly on par.

    Choosing an Always Free Cloud VM: Conclusion

    And the winner is: it depends. If you are looking for maximum CPU performance, GCP wins, but for server applications you probably still want the extra memory of Oracle. Apart from that, Oracle offers more traffic, more storage and two instances instead of one, so it’s what I will use as the default for my projects. Or just use both, since they are free.

  • Ultra Budget NAS build 2019: 16TB and more speed for 350€

    This is an update to last year’s ultra budget NAS build. Since I had mentioned “2018” in the title, I am now obligated to make a “2019” update.

    So what has changed since then?
    Firstly, the prices for internal HDDs haven’t fallen. The Intenso drives I used last year are still some of the best in terms of price per capacity. Secondly, the Raspberry Pi 4 was released with much faster processing and networking speeds, 2x USB 3.0 and the option for 4GB of memory. All of these upgrades make it perfect for a budget NAS build, in fact, this is so much more powerful that you may want use it as a fully fledged home server for some tasks.

    Components

    As you can see, I decided to use two external HDDs instead of four internal ones with separate cases. This year, this makes more sense, because they offer much storage for their price, especially taking the included cases into account. Furthermore, these already support USB 3.0; perfect for the upgrade to the Pi 4 which has exactly two USB 3.0 ports. One could consider having only two disks to be an advantage or a disadvantage, though. You won’t be able to use RAID 5, but if you were going to use RAID 1 anyway, then having fewer disks will be more reliable and use less power and space.

    The Pi 4 upgrade is a no-brainer. It should be much, much faster for NAS applications. You could use one with less RAM, but having the extra capacity for caching or other home server applications is probably worth it for future proofing. While I didn’t add separate cooling last year, this year it is really necessary. While cheaper options may be possible, this will also give you a nice and sturdy metal case. The official Pi 4 power supply is one of the cheapest that are available and should be very reliable. Finally, microSDs have dropped even further in price: This year we can have 64GB, giving you more headroom in general.

    While I wish could have achieved 300€ again this year, that number just didn’t make sense this time around and the added performance and capacity are definitely worth it. This is a worthy Ultra Budget NAS build!

  • How to use any SMB share for Time Machine backups

    For some reason, Apple only allows Time Machine backups to SMB servers that fulfill certain requirements. Some brand name NAS machines work, others don’t. I want to to use my AVM router for backups, but the application won’t let me. Googling reveals some old solutions involving custom scripts – which should work, but here is a an IMO more elegant solution to use any SMB share for Time Machine backups, that doesn’t fail even if the network drive is disconnected:

    Instructions

    Create Time Machine image on the SMB share

    Use the disk utility to create a sparse bundle (File -> New Image -> Blank Image). These are like disk images, but only take up as much storage as necessary and internally consist of many smaller files. With these properties they are ideal for network storage. Make sure the size is sufficient for your backup. Place it on the network share you want to use.

    Automate mounting the SMB share and Time Machine image

    Next comes the magic – we need to automate connecting to the share and mounting the Time Machine bundle in the background. For that, launch the Automator App and build this simple workflow:
    Get Specified Servers (add the SMB share root) -> Connect to Servers | (ignore input) | Get Specified Finder Items (add the Time Machine File) -> Open Finder Items.
    It should look something like this:

    Use the play button in the top right corner to run it once. You may get asked to log in to the share, so make sure to save that login. Any subsequent executions should work without any prompt and if the share/Time Machine are already connected, there should be no issues.
    Save this workflow at some location, for example your Documents folder.

    Automate the workflow with launchd

    Now we just have to make this workflow run automatically. Use the terminal or the finder (with hidden files being displayed) to create a new “.plist” file in /Users/<username>/Library/LaunchAgents. I named mine “us.yugen.TimeMachineAutoMounter.agent.plist”. Edit it with a text editor of your choice and just paste this:

    <?xml version="1.0" encoding="UTF-8"?>
    <!DOCTYPE plist PUBLIC "-//Apple Computer//DTD PLIST 1.0//EN" "http://www.apple.com/DTDs/PropertyList-1.0.dtd">
    <plist version="1.0">
    <dict>
    	<key>Label</key>
    	<string>us.yugen.timemachineautomounter</string>
    	<key>ProgramArguments</key>
    	<array>
    		<string>sh</string>
    		<string>-c</string>
    		<string>/usr/bin/automator /Users/andreas/Documents/Scripts/TimeMachineAutoMounter.workflow >> /Users/andreas/Documents/Scripts/TimeMachineAutoMounter.workflow.out 2>&1</string>
    	</array>
    	<key>RunAtLoad</key>
    	<true/>
    	<key>StartInterval</key>
    	<integer>300</integer>
    </dict>
    </plist>

    Adjust the paths to match the path to your .workflow file. You may also optionally remove this part if you do not want a log file, though it may help troubleshooting: /Users/andreas/Documents/Scripts/TimeMachineAutoMounter.workflow.out 2>&1
    You can also change 300 to something else – this is the interval in seconds at which it will retry to connect to the share if it loses connection – 5 minutes seems reasonable.

    Next, launch the terminal and enter:
    launchctl load /Users/<username>/Library/LaunchAgents/<plist file name>
    And then once you see the time machine mounted in the Finder, execute:
    sudo tmutil setdestination /Volumes/<name of time machine image>/
    That is necessary, because the Time Machine GUI still won’t let you select the image you created for backups.

    That’s it! With this, you can use any SMB share for Time Machine backups, your SMB share and time machine will be mounted automatically. If your machine loses connection, it will reestablish it automatically. Whenever it is available, Time Machine will resume backing up.

    Suggested links and sources

    https://blog.macsales.com/43946-tech-101-how-to-schedule-time-machine-backups/
    https://www.imore.com/how-use-time-machine-backup-your-mac-windows-shared-folder

  • Migrating from Adobe CC to Open Source Software

    For several years my photo editing workflow went something like this:

    • Take a picture, RAW+JPEG.
    • Plug SD card into my PC.
    • Import it into Lightroom Classic CC, lossless conversion to DNG.
    • Occasionally LR backs up its catalog.
    • Windows File History backs them up to my NAS.
    • A script backs them up to LTO-4 tapes.
    • I’ll browse through my catalog and flag the ones I think are good enough to edit.
    • I apply the LR auto adjustments and tweak them a little to see how far I get.
    • Now I can start cropping, editing, correcting and applying filters with the Nik collection.
    • The finished product is then exported to Google Drive and then shared to to social media.
    • If I’m not home I don’t have a proper workflow, meaning I often create redundant backups or have difficulties finding specific pictures.

    This comes with a few problems:

    • It’s pretty darn complicated. I wish I could cut out a few layers of complexity.
    • I have to use proprietary software that doesn’t run well under Linux, so I can only use this workflow when I’m at home.
    • It costs quite a bit of money. Even with a student discount, LR Classic CC costs at minimum 12€ per month.
    • Lightroom performance is horrible. Lightroom CC is lacking basic features and I don’t want to upload everything to the cloud.
    • I use hardly any Adobe specific features. Automatic lens corrections aren’t that important, I can live without the Nik collection.

    I solved some of my issues with the following workflow:

    • Regardless of whether I’m at home or travelling with my linux laptop, I’m now using Darktable with the “local copies feature” to avoid redundant backups.
    • I’m keeping the “two tier” storage system. All photos in their raw form are at some point imported through darktable into my central NAS, but all finished pictures are stored on my Google Drive. This means I can always access my most important data quickly even if it comes from outside my main workflow (e.g. edited on my phone…).
    • The actual editing can take place in Darktable, RawTherapee, Snapseed or Lightroom Mobile. If I’m on a computer the data will still go through Darktable and then to my NAS and also be exported to Google Drive, otherwise it will directly go to the Drive.
    • I avoid the cost of Adobe products. The initial migration to this new workflow was pretty quick, and now 99% of the time I can use one path for everything.
    • The actual editing results for me are comparable to what I could achieve with Lightroom.
  • Ultra Budget NAS build 2018: 12TB for 300€

    With the release of the new Raspberry Pi 3 Model B+ and me still looking to build a NAS (Network attached storage or home server), this ultra budget build was something I came up with:

    2019 Update: Ultra Budget NAS Build 2019

    Components for the Budget NAS build 2018

    • 1x Raspberry Pi 3 Modell B+ ~35€
    • 4x Cremax Icy Dock MB559UEA-1SB ~8€ each
    • 4x Intenso SATA HDD 6513113 ~60€ each
    • 1x SODIAL Raspberry Pi case ~2€
    • 1x Official Raspberry Pi 2.5A micro USB power supply ~8€
    • 1x Kingston 16 GB micro SDHC card ~3€

    Geizhals wishlist

    Some additional cabling may be required.

    Possible options

    • You can technically omit the case, an old phone charger with enough power should suffice as the power supply. A few more cents could be saved by going for an even smaller SD card.
    • While at the time of this writing, these 3TB Intenso HDDs offer the best bang for your buck, you don’t have to get four if you don’t need 12TB. Currently picking anything less than 3TB makes little sense, unless you have to save every last bit of money: The Toshiba DT01ACA 1TB HDD for 35€ each is the best 1TB option.
    • You should expect the USB bus to be the limiting factor here in terms of performance. While the Pi only supports USB 2.0, you might want to consider getting USB 3.0 cases instead, so you can load the initial data directly from your PC faster. The LogiLink UA0107 costs about 15€ and should be faster than the Icy Dock.

    Definitely pick the new Pi 3B+. Because its Ethernet connection doesn’t use USB anymore, it should be much faster than previous models for this application.

    Since these HDDs are not meant for NAS operation, you should probably set up a RAID 5 or 1 just to be safe.

    For software you could go with just Raspbian or the more specialized OpenMediaVault.

    Update: I only noticed just now, but it seems I’m one day late for World Backup Day. Shoot.